Thursday, 23 April 2015

Task 1 Schedule


I have created a schedule to manage my time so that I can keep on track and understand what future tasks I will need to do.


20/04/2015


27/04/2015

4/05/2015


11/05/2015


18/05/2015


25/05/2015


1/06/2015


8/06/2015


27/04/2015This week I began my schedule and my research task. Also I began looking for a human character model; as I wanted to animate a human character. I have now managed to finish my research task as I have talked about what I want to animate and also collected many videos off YouTube to help me when animating. Furthermore, next week I plan on finding a character model as I am currently still searching. In addition, I plan on starting my Ideas generating task.

4/05/2015 - This week I started my Ideas generation task. I created a mind map and a mood board in order to complete this task. Also I managed to create my story board for my animation. Next week I plan on getting my ethical task signed off and then starting production.

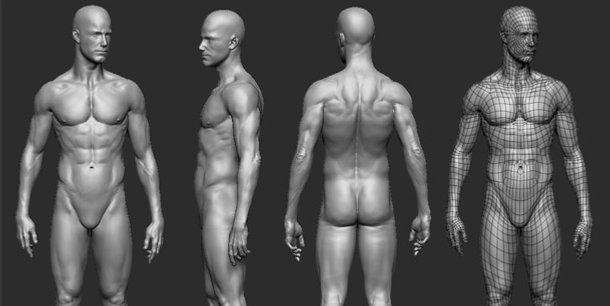
11/05/2015 - This week I got my ethical task signed off and the began production. By now I had a character to animate and so I started in modeler, adding skelegons to the character model. I then decided to tweak the character as one of its arms were crooked. After this I opened the character into layout and converted the skelegons to bones. Next week I plan on animating my character on layout.

18/05/2015 - This week I carried on with production and created 2 animations. In addition, I have also rendered both animations ready for YouTube and the blogger. Next week I plan on creating more animations for production.
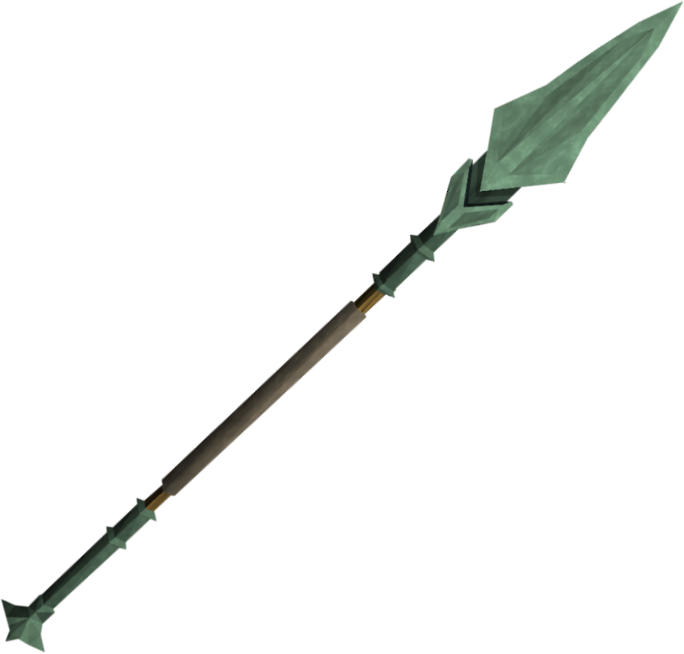
25/05/2015 This week I managed to complete 2 more animations and also render them. I only have 1 more animation to go, as I have decided to not do one of my animations (the running animation) as there was difficulties e.g. the models weapon stared to bend increasingly. Next week I plan on finishing my last animation and moving on to the post production task.

1/06/2015 - This week I managed to finish my final animation and I have also now rendered all animations. Furthermore I have uploaded all animations to YouTube and embedded them on to my post production task on blogger. Next week I plan on starting my last task which is reviewing.   

8/06/2015 - This week I created some surveys for feedback. When I got results back I then wrote about what I thought about peoples responses. I then blogged my surveys with my responses. Lastly, I began my evaluation task and manged to complete it. All work for Unit 67 is now complete. 

Task 2 Research


I plan on creating an animation on a human character. This way I can add bones and use the same techniques from creating the bat animation. Also, with a human character I can collect many ideas of what animation I intend to use and portray.


This animation shows a human character, kicking over a block (wall). After this motion the character then portrays a a melee attack using the stock of his gun. I Believe this video can give me ideas, as my initial idea is to animate a human character. Overall, I could maybe use some of these motions on my character.


https://www.youtube.com/watch?v=AukEMOMmwvs


This next animation shows a human character generating many actions from walking down and up stairs, crawling, walking etc. I believe this video may help me in future process as I could maybe use one of these ideas on my character.


https://www.youtube.com/watch?v=0Djun8lzzwU


This animation shows a human character portraying a melee attack using a sword. This animation can help me as I may try giving my character melee attack moves and so I can re watch this animation to pick up on key events from this animation. Overall, I believe this can help me with my animation ideas.


https://www.youtube.com/watch?v=JfndSftDnMw


This animation is of a character generating many motions from shooting and running. I can use this video when helping me animate as I plan on making my character walk and run. When animating, I can look back at this for inspiration and ideas.


https://www.youtube.com/watch?v=EcPbIFbHe6A


For the character I assume I would use a human figure like this one. By using a human model like this, I can add bones and skelegons to the body parts for me then to animate.  Furthermore, If I can get a human character with some clothing I may choose that as it gives the character more of a story and also in some ways makes the character look better for animating.


http://www.cgchannel.com/wp-content/uploads/2011/09/110814_CGEverything1.jpg

Furthermore, The character I plan on animating is a gladiator or spartan warrior. I believe if I chose this type of character, I will have very open choices of what I can chose for the animations e.g. attack moves, deaths, walking and running.

http://fc07.deviantart.net/fs70/i/2014/109/d/1/spartacus_inspired_gladiator_character_model_by_hercool-d7f3l48.jpg

Overall, I will use this research to help me when animating and also, I believe I will stick with the character animation ideas as when it comes to adding skeletons and bones, I know where to put them and also have many ideas of what I can animate.


Task 3 Ideas Generation


Mind Map


Mood board 


Task 4 Storyboard


This is my storyboard in which my animations will be created from.


Task 5 Ethical/H&S Sign-off


This is my confirmation of my Ethical /H&S being signed off.


Task 6 Production


Modeler - 

First of all, I chose a human character model to animate. I decided to open the model on modeler and then adjust some things on the character model e.g. its arms. I then added skelegons on modeler in to all the parts of the body,in which I wanted to move e.g. legs, arms and back. etc. The skelegons are the colour blue on this image; so you can see where they are placed.


To add the skelegons I clicked on 'setup' and then chose 'create skelegons'. From This I could simply draw skelegons through the arms etc, However, I found that is was easier to create the skelegons on another layer to then later merge to just one layer


Layout - 

When all the skelegons were added, I opened up the Modeler project with 'Layout'. Now I was on Layout, I could then convert the skelegons to bones.The next step was to parent all the body parts to 1 main body part e.g. the backbone of the model.


To parent my bones, I clicked on 'Scene Editor' and then selected 'Scene Editor' again. I also decided to name my bones as this way I could keep a clear understanding of which bones were in the different body parts.


At this stage I was now ready to create my first animation. My first animation was a fight animation where the character portrays a slicing effect with its weapon. To move the body parts, I used the 'Move Tool' and 'Rotation Tool' to create the animation. I also used the enter key to create
'key frames' along the way.


After I had the animation complete, I then used the play option to play the animation back. If there was any issues with the animation, I could then go over parts and tweak them. I could then play the animation again to see if I had fixed the problems.


Once the animation was up to this stage, I could now texture the character. I selected the
 'surface editor' likewise before and then chose the surface I wanted to texture. I then selected 'windows' and then 'presets'


         I could now give the character a texture, I decided to give my character a metal look called 
                                                                        'Ball Bearing' 


Now I could begin rendering the animation. To do this I started by selecting the 'Render tab' and then select 'Render globals'. After this, I then selected the 'Output' and then changed the 'Type' to 'AVI'.


Next, I needed to add a 'Ground plane' to do this I selected 'Modeler tools' the 'geometry' and the I selected 'Ground plane'


I then needed a background. To add this I selected 'Windows' and then 'Backdrop options' I then made the background the colour white 


After this I then went back to the 'Render tab' and selected 'Render scene. This was the finale stage of the product.


For all the other animations created, I used the same technique as I did for this one. From using this technique I have managed to be successful at completing the animations on time and at a standard, in which I am happy with. 

Task 7 Post Production


These are the final animations animated fully. After rendering the animations I then uploaded the videos to YouTube and embedded them to the blog. 


I also planned on creating a running animation, but the characters weapon began to bend increasingly and the arms of the character began to glitch. Therefor I could not complete this animation.


Death animation 


Walk animation 


Kick animation 


Fight 1 animation 


Fight 2 animation